Workflow: New, Clean, Updated and UI on boost with JQuery 1.4
Discovering the already 1-month old super fast awesome JQuery 1.4, (what’s new?) we have integrated it seamlessly in our current user task list, and it turns out we only gained speed and reduced the number of bugs. Kudos to the developers. That was the sweetest upgrade ever. Not a single glitch.
To celebrate, realized it was due time to make a quick new Tempo release. Things done, and the release itself can be found on the intalio.org maven repository:
http://www.intalio.org/public/maven2/org/intalio/jetty/tempo-jetty7/6.0.4.001/
And mostly includes updated version of the core components:
The build can be recreated simply by using the tempo_builder_jetty.rb script, which relies on a clean and working buildr installation.
The build can be started by following the two simple steps:
- create a mysql bpms database, and import the ode tables found in the bpms.sql file
- start the server using ./bin/jetty.sh run
The build process itself is pulling out all sorts of artifacts from different repository, so I decided to clean the dust and push out a quick diagram so that it’s easier to know what’s who and where (in the world is Carmen San Diego?)
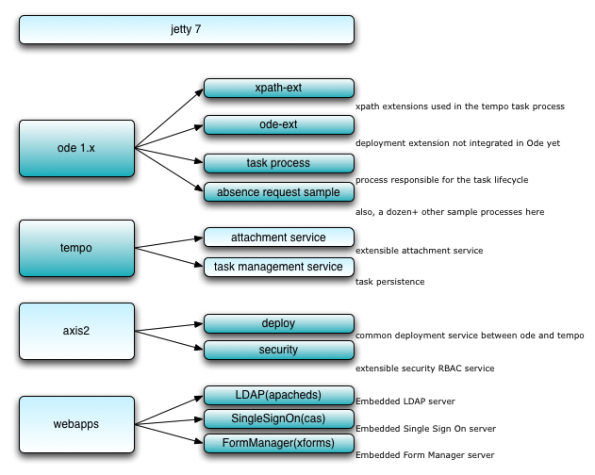 A click-able version of the diagram is here.
Disclaimer notes:
- This release does not include the windows binaries to start the jetty server.
- This release has only been tested on a minimum number of configurations, and there is absolutely no warranty it will work in your environment.
SOAP UI, Regression Testing of Human based processes, using Groovy scripts or SOAP UI Steps
We have been using SOAP UI for regression and load testing of workflow. SOAP UI can be downloaded for free from the soapui.org website.
Our story today is to test the absence request, which is basically a five step human workflow:
- init process from a human task
- create an activity task,
- complete the activity task,
- create a notification, and
- dismiss the notification
The graphical BPMN looks something similar to this:
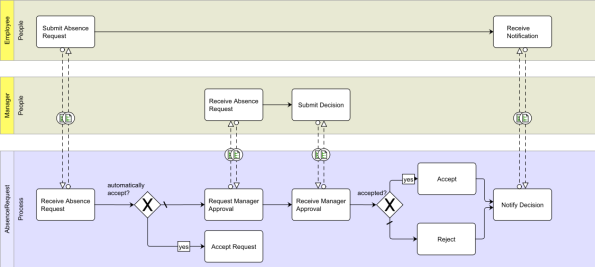
We are going to also add a new call to the authentication service, provided on the runtime, so that we can retrieve the authentication token and re-use it throughout the test case.
1. Standard SOAP UI Testing
The actual SOAP UI test case will then look like this:
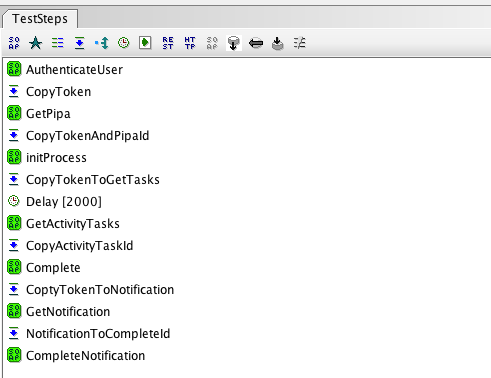 Let’s go through the different steps:
- AuthenticateUser: Send a request to the security service and retrieve the security token

- CopyToken: This steps copies the token retrieve from the call to the security service to the request we are about to make to TMS.
- GetPipa: Send a request to TMS.getAvailableTasks, targeted for the pipa of the absence request. We retrieve only one task from this call
- CopyTokenAndPipaId: Similar to 2, we copy the token, and also the taskId of the pipa task, collected from 3
- initProcess: Send a request to TMS.initProcess that will then call the process engine to start the process accordingly.
This steps is equivalent to the action of pressing the start button in the form manager:
- CopyTokenToGetTasks: Copy the security token.
- Delay: We need to wait for the task to be assigned to our current user, according to the process. We are now at the step describe below:
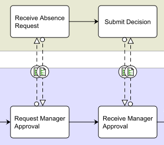
- GetActivityTasks: Now that the activity task “Request Manager Approval” should be in the task list, let’s retrieve its id
- CopyActivityTaskId: Copy token and taskId for the next request
- Complete: This one is called on TMP, the TaskManagementProcess, because it handles the task lifecycle.
The endpoint for TMP can be found locally at: http://localhost:8080/ode/processes/completeTask?wsdl This step does the same as filling the form of the activity task and using the complete button of the form manager.

- GetNotification: Calling TMS.getAvailableTasks this time again, but with Notification in state READY as a target.
- CompleteNotification: This would be the same as pressing the Dismiss button

2. Testing through Groovy Scripting
SoapUI has a very detailed documentation on how to write tests using groovy scripting with SOAP UI.
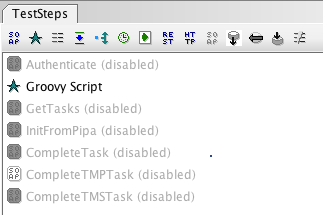
This then looks like the screenshot below:
Only the Groovy Script is enabled.
A quick excerpt of the groovy script looks like this:
We then can go through all the same steps exposed into section 1.
3. Download and run.
The SOAP UI project for testing workflow and absence request can be found on github.
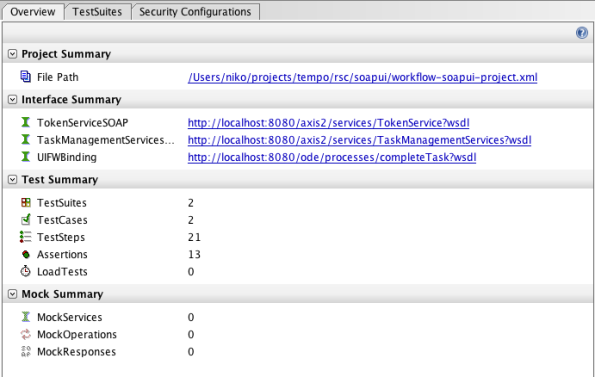
After importing, you will see a summary of the project:
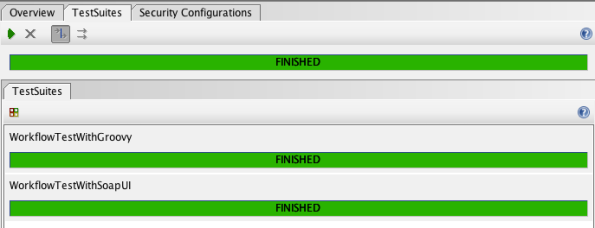
And you can run the two tests straight from the TestSuites tab.
Now if you feel like contributing new workflow processes, and new workflow test cases, let us know.
2009 OpenSourceCamp/Apache BarCamp/Eclipse DemoCamp Joinup Event
We will be presenting at the OpenSourceCamp in Beijing, China this coming Saturday (November 28th 2009). We will be talking about all things open source at Intalio, Intalio|Works, Tempo and quite a few interesting announcements.
“Open Source Camp is ad-hoc and unconference event that brings together open source developer, Geek , entrepreneurs, academics, venture capitalists, and technology influencer, tech media for an intense user-created conference about open source, emerging technology topics. It’s organized by the community, for the community. The event combines,sharing,learning,networking, and fun. Participants, who are experts and innovators in their fields, are also the presenters. The goal is to boost open source community and innovation around the world.
This year is special because we bring together Apache Barcamp and Eclipse DemoCamp at the same time and same place, it’s real communites collaboration and meetup.”
For more info: http://opensourcecamp2009.eventbrite.com/
See you there !
Update Human Task Metadata Implemented: Priority and other friends
A well needed addition to task management is now the possibility to edit metadata for an activity task.
Say you look at your task list:
 And you feel you want to change the priority for this task. You would just have to click on the “Edit Task” button:
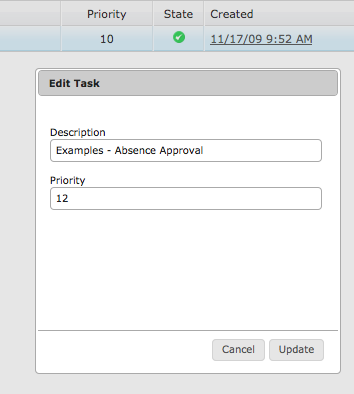
That would trigger the jQuery-based dialog to edit the properties:
We decide we want to raise the priority from 10 to 12, and click update.
 The new task has its priority updated.
In the background, there is a new method in the Tempo Task Management Service, simply named update:
The request is made of the usual Single Sign On participant token to check the session credentials, and of a task. The task with the same taskID, will be fetched from the persistence, and then fields will be updated after their input has been validated.
 The response for this call is simply the okResponse, and a few fault can be thrown in case of invalid input parameters.
There is also a coming version of that dialog with a *star rating*-like display for the priority field:
Build with Jetty 7, Tempo, Ode, SSO w/ CAS, LDAP w/ ApacheDS on MYSQL
The Story
Having the jetty guys nearby being one of the coolest thing of this year, we had to just kick off a build of the different Tempo components all running on the recently released Jetty 7.
This is now done and available, and the least we can say, it’s fast.
The Short
The hassle free version is along those lines:
- Download the zip file,
- run the DB script for MySQL named bpms.sql found inside the release folder,
- Start jetty, using the jetty.sh script.
The Long
The long non-short version, meaning that you can fully reproduce the build yourself, is described below:
Most is based by configuring the different versions of the components you want to use and then simply running the following ruby script.
Here are all the necessary steps you need to go through to reproduce the build on your own machine:
- Get yourself a JDK installed
- Define JAVA_HOME properly
- Install Ruby, Ruby gems, and add the gems/bin folder to your path
- Install the following gems: buildr, hpricot and their dependencies
- When using jruby, use hpricot version 0.6, and install jruby-openssl
- while we’re at it, you may need ssl-dev on linux
- Install git, and clone the tempo public repository
- Install MySQL (with GUI client if needed)
- Create the bpms database in mysql, and run the script named bpms.sql found in the build folder
- Run the script, by running the script ./rsc/script/tempo_builder_jetty.rb (edit the versions directly within that files if you want)
- The resulting build is in the newly created target folder
- Run jetty, ./bin/jetty.sh run
- Access http://localhost:8080/ui-fw, and you should be redirected to the CAS login page for integrated Single Sign On
- The secret login is admin/changeit, and you can add change users by defining some more in LDAP/ApacheDS
- You are logged in and can now see your tasks and start working.
The beginning
You are ready to …

Workflow, DMS, Nuxeo: cool update for attaching documents in Tempo
I had to check on how the CMIS support was implemented in Nuxeo, and a few other CMS/DMS platforms. Went on doing my duties and realized we had no support to store attachments in Nuxeo for Tempo. So here I go, spending a late evening on my way back in the last train for Yokohama to code that and push it to github.
They have quite a cool remote api that they have named restlet api, that you can use to execute your favorite remote CRUD operations, along a few others. It came out the api is easy to learn and here we go for a few screenshots to show how it works now.
Note that this suppose you have a running nuxeo server, (download here) with the restpack installed.
Below is how you configure the TaskAttachmentService (in tempo-tas.xml) to use the NuxeoStorageStrategy.
 Nothing special here. Just note that the folder named repoName will be created on demand.
Let’s go to edit an activity task in Tempo and attach a file, here named beach7.jpg
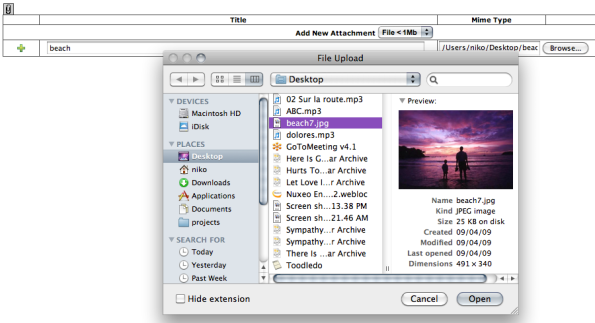
The file has been uploaded, and is now an attachment for that task.
So let’s go and see on the Nuxeo side what happens. Let’s log in and browse around a bit.
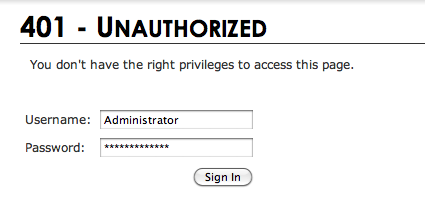
Note that the repository folder that we defined in the configuration file has been automatically created.

Now we can display the image, straight from the task, or straight from Nuxeo.

And a video to show, it’s As easy as ABC.
Automated Human Workflow with Tempo
Long time no post, so I am taking the opportunity of a customer request that came yesterday about documenting the different web services needed to automate a Tempo workflow through Intalio|BPMS.
What we want to achieve, is simply to control the different state of a Task through web services, so the task will appear in the task list of a user, and then get completed with a bit of custom data. You could integrate this in your process, by having the create part automated, or the complete part automated with custom data.
The process here is located on github, and the process is named CreateExample.
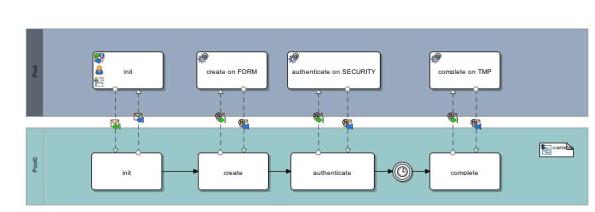
The process starts with a form to initiate the process. This calls an endpoint created by Ode after this particular process has been deployed. What happens then is that the user opens the form, and the form manager will eventually send an init request to the TaskManagementService.
The flow for initiating the process is shown in more details on the tempo wiki:, on the people initiated process page.
Then a bit of data mapping, before sending the create request to the static form responsible for the dynamic task to be created.
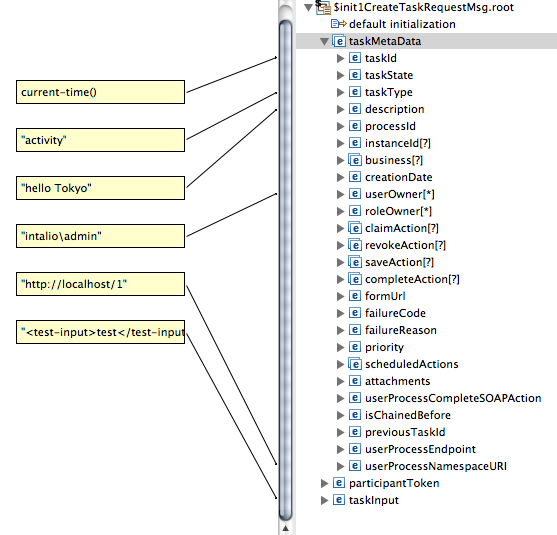
Last step, is to send the complete request to Task Manager Process, the process responsible for the Task Life cycle.
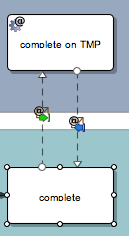
This is also largely explained less graphically in a test we have on github for tempo, totally manipulating every state of tasks through code, that code mostly sending http requests to the appropriate service. You can see that in this junit java test.
jQuery, SOAP, Ajax and updated UI for workflow
New UI, with jquery actions
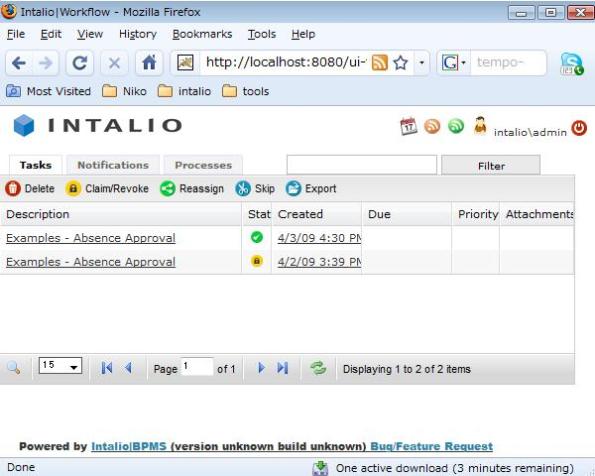
To enable the toolbar in the tempo task list, edit the tempo-ui-fw.xml in the config folder and set the following:
<property name=”useToolbarIcons” value=”true”/>
This will tell the UI to load the optional icons as seen in the screenshot below:
- Delete: delete the tasks from the task list, and also completely from the database. This has been asked when the process had failed and the task was not relevant anymore for the process
- Claim/Revoke: this takes ownership of the task, and prevent the task from showing up into other users task list. Revoke does the opposite, give back the ownership, and other users can see and act on the task again. This will almost instantly change the icon related to the task, as shown below:

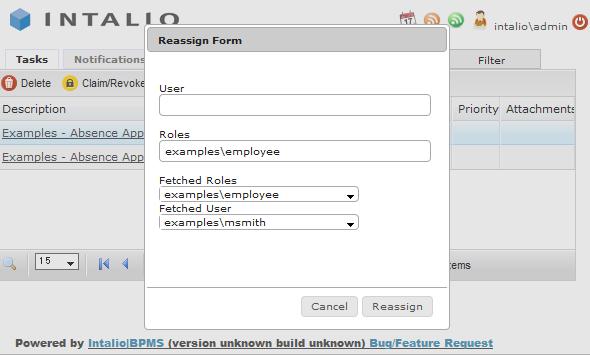
- Reassign: You can reassign the task to other users or groups. This also dynamically loads users and roles from the RBAC service in tempo so you can select from the drop down menus.
- Skip: Put the task in a skipped state, so that it does not show in the task list anymore, but does not delete from the database either.
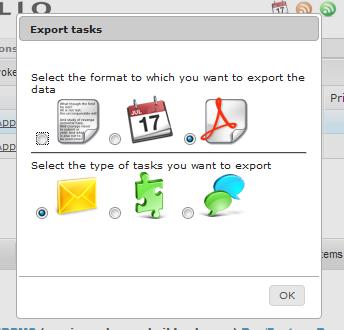
- Export: a common place to export to PDF, iCAL, CSV your own tasks.
Jquery and SOAP
I”ve used the excellent SOAP Plugin for Jquery which had almost everything out of the box ready to use cross site scripting, without which anything ajax won’t work.
I just added a quick forward proxy implementation. What it does it just take the soap request from the client side of the UI, and forward them to any proper remote server, using awefuly simple java code. (Thanks http client)
Add your own actions
The following file in github has all the needed code you would want to add your own custom action. Go ahead and display that google map based on the geolocation of the logged user. The power is yours.
Jquery UI 1.7 has made its way in, so you can use its delicious dialogs and other freebies.
Session Timeout and server disconnect
You can now configure the session timeout, as well as the ajax timeouts, as shown in tempo-ui-fw,xml.
<property name=”sessionTimeout” value=”10″/> // in minutes
<property name=”ajaxTimeout” value=”10000″/> // in milliseconds
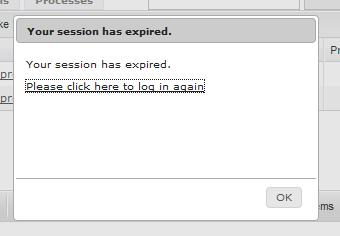
In each case, this will show a dialog just like the one below:
This will also prevent any misplaced client-side action. Here the log in again forces you to log back in again. Of course you could very well, implement your own handlers and custom code, to perform the login through the Token Service, or any other requirements you might have.
The ajax time out, is directly related to the ajax activity, and is used to detect when a server has gone down, and the connection has been lost. This will prevent the client side scripting to send unnecessary requests and over loads the server.
In regular activity, we’ve sligthly added some feedback with a custom ajax loading indicator,designed with webscript lab.
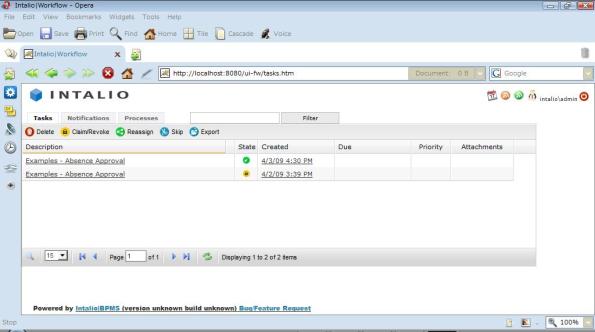
Browser compatibility: IE6,7, Firefox, Safari, Opera
With a little help from my friend, IETester, I’ve gone through quite some extensive testing of the different browser resulting in a, hopefully, better user experience.
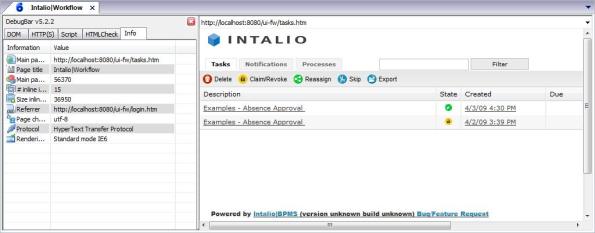
I also finally understood how to make those horrible scrollbars disappear in an IE6 internal IFrame, which is by loading not a blank page, but an empty page. Empty is not blank.
and “if actions are stronger than words, why is the pen mightier than the sword?” … (answer here). Anyway, with IE6, I used everything I could find, Swords, pens and empty pages.
Good news in the end, even safari and opera liked it.
Tempo Tasks List Performance, Load Testing and some Ruby scripting
A customer reported some performance degradation with the task list under a bit of load, (~500 active tasks per user), so decided to have a quick look and boost off a bit the different components involved in sorting, displaying and all the jazz that the Tempo task list is doing.

So, a few quick ruby scripts later, we’re ready to unleash a nice crafted bomb on the Workflow.
First one, create_tasks.rb, allows you to load as many tasks as you want, most of the parameters are in the script, you can modify them at will. The default is to load a mere 5000 active tasks and I think this is going to be enough for the purpose of this post. Below is the time it took on a tomcat install, with persistence to derby, (worst case scenario).
./create_tasks.rb 60.02s user 18.83s system 60% cpu 2:09.49 total
That’s almost 100 tasks created per second.
Now I can log in with the default Tempo account in the task list, and look at all the loaded tasks:
 We do have the 5000 items, and believe me or not, (for now), the page loaded pretty quickly.
There is a threaded ruby client, which sends requests to the server.
With 20 clients in parallel accessing each their *5000 tasks* task list, we got a sensible curve:

Horizontally is the time since the start of the test, so all in all, it took 200 seconds for 20 clients to retrieve 20 times their task list.
Last, the script to delete the tasks, to remove all those annoying activity tasks we’ve created, and the server is back to its original freshness.
Now if some people are ready to use those scripts to test on different database, with remote clients, I would love to get the results.
Voila !
Embedded LDAP in 2 minutes (… and a bit of RBAC)
Embedded LDAP in 2 minutes
Running a standalone LDAP server is rather easy.
Getting that server to be embedded in your server may be slightly different.
ApacheDS has quite a few links to do it properly, but you need to do some gymnastics to compile the war file, set it up, start the server and finally get it working with different domains.
As part of the migration of Tempo to github, we also got the ApacheDS code in its own github fork.
So, all you need to do to get your embedded LDAP server, is to get your own war file, download tomcat and start the server.
You can setup additional LDAP partitions on the fly by editing the partitions.json file present in the expanded war file. No need to code. A partition looks like this:
“intalio”: {
“dn”:”dc=intalio,dc=com”,
“attributes”: {
“dc”:”intalio”,
“objectClass”:[“top”,”domain”,”extensibleObject”]
}
}
So you can add/remove then before starting the server, the applications filters will handle the initialization.
On the same note, ldif files to be imported can just be dropped in the classes folder, and they will be imported when the server start.

Import LDIF
Same again, drag and drop no need to code.
Hugues being still busy writing a wicked RBAC visual editor for Intalio|Designer to make it easy to manage the users and roles, we will rely on Apache Directory Studio (download, eclipse update).
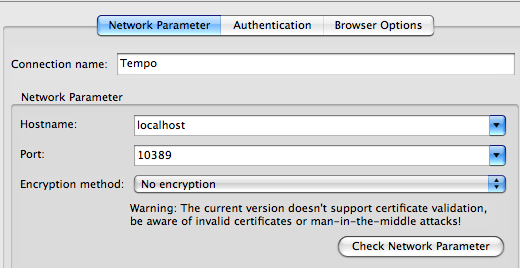
Network Parameters
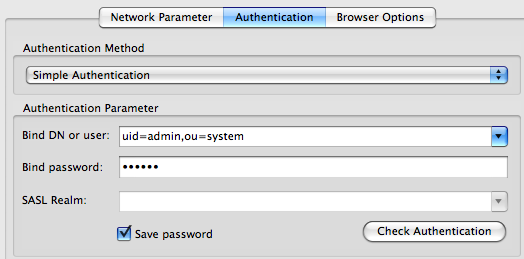
Authentication Settings
User is uid=admin,ou=system Password is secret by default, and you’re all set to connect.
Expanding the default, we can see:
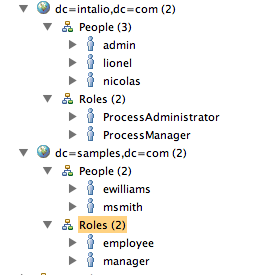
People and Roles
Copy and paste users, and roles, rename then on the fly, like here:
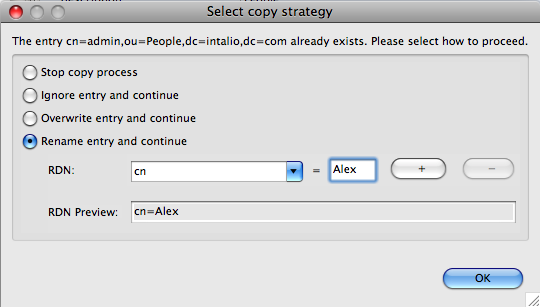
Create a new user
In Preferences, LDAP-> Entry Editor, remove the noisy LDAP attributes:

No noise
And use the entry editor, to edit the newly user:
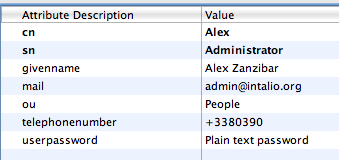
Edit User
Still a few glinches of LDAP prose, but we have written no code, we’re under 2 minutes and you should have an LDAP server setup.
… and a bit of RBAC
If you have Intalio|BPMS, (or the open source Tempo bundle) then LDAP authentication is either enabled by default or you can do that through the securityConfig.xml file:
<!– <bean id=”securityProvider” class=”org.intalio.tempo.security.simple.SimpleSecurityProvider” init-method=”init”>
<property name=”configFile”>
<value>${org.intalio.tempo.configDirectory}/security.xml</value>
</property>
</bean> –><bean id=”securityProvider” class=”org.intalio.tempo.security.ldap.LDAPSecurityProvider”>
<property name=”propertiesFile”>
<value>${org.intalio.tempo.configDirectory}/ldap.properties</value>
</property>
</bean>
Then, head to the local integrated RBAC Query Service, and try to see which users for which roles:

Soap me
Voila !
